Steps:
- Intro
- VSO
- Docker
- xUnit
- Build
- Back end
- Selenium
- Docker
- Release Management
- Testing
Microsoft Visual Studio has tooling that eases the creation and deployment of Docker hosts.
In this post we are going install the extensions and configure our Docker host.
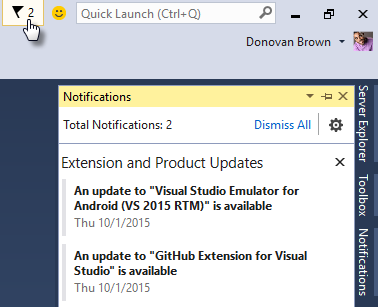
Be sure to check that all your tools and extensions are up to date by visiting the Notifications in Visual Studio.
Once your IDE is up to date we can install the needed extensions.
For this demo we are going to need
Tools for Docker
,
SQL Server Data Tools
,
and
ASP.NET and Web Tools
.
The tools for Docker enable the deployment of ASP.NET 5 applications to
Docker containers running on Linux or Windows VMs. Make sure you have at least
version 0.7.1.
-
Install Web Tools Extensions
- Visit Microsoft ASP.NET and Web Tools 2015 download page
- Click Download
- Check DotNetVersionManager-x64.msi
- Check WebToolsExtensionsVS14.msi
- Click Next
- Click Run on both the msis and install one after the other
-
Install Tools for Docker
- Visit Tools for Docker download page
- Click Download button
- Click Run
- Install
-
Update SSDT
- From the Tools menu, select Extensions and Updates
- SSDT should already be installed but still verify there are no updates needed
- If you find any, install them before you proceed
SQL Server Data Tools is one of Microsoft’s best kept secrets. If you are developing for SQL Server, you owe
it to yourself to at least research the power in SSDT. SSDT enables the management of your database
schema just like every other project in your solution and deploys your changes
without writing a single line of SQL and without losing a single line of
data.
To make sure everything is set up correctly, let's create the ASP.NET 5 application we are going to use in this demo.
-
Create ASP.NET 5 app
- From the File menu select New / Project…
- From the Visual C# section select Web
- Select the ASP.NET Web Application template
- Enter PeopleTracker.Preview as the name
- Enter PeopleTracker as the solution name
- Check the Add to source control check box
- Click OK
- Select Web Application from the ASP.NET 5 Preview Templates
-
Change the Authentication to No Authentication
- Click Change Authentication
- Select No Authentication
- Click OK
- Uncheck Host in the cloud check box
- Click OK
-
Select Git
- This demo would also work if we selected TFVC. However, for this demo I wanted to show how to work with our new Pull Request feature, so I selected Git. TFVC is not going away and is still a valid source control choice.
- Click OK
Once the project creation is complete, compile and run the application to make sure everything is working as expected.
-
Create Dev Docker Host
- Right-click project
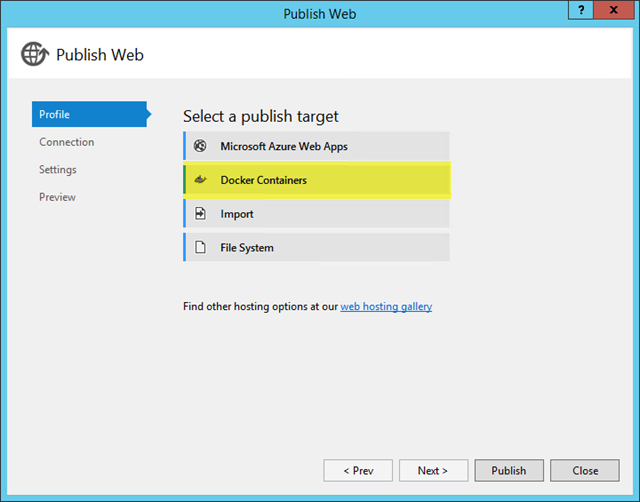
- Select Publish...
-
Select Docker Containers
- Click the New... button
- Select Subscription
- Select Location
- Enter DNS name for Dev Docker Host
- Select Ubuntu Server 15.04 for image
- Enter Username
- Enter Password
- Confirm Password
- Click OK
- Click OK on Virtual Machine Creation Started dialog
A PublishScripts folder will be added to your solution with a Scripts and Templates folders. For each host you create you will get a PowerShell script and two json files. You can monitor the progress from the Output window or from the Azure Portal. When the deployment of the template is complete you will have a folder created that has all the certs needed to connect to the host. We will reuse theses certs when we create the additional Docker Hosts. Each Docker Host will be created in its own Resource Group and will include the following:
- Virtual Machine
- Network Adapter
- Public IP
- Virtual Network
- Storage Account
-
Publish to your Dev Docker Host
- Right-click project
-
Select Publish
- This time, the Publish dialog will open on the Connection tab.
- Click Validate Connection
- Click Next
- Click Publish
Leave the Dockerfile text box empty so it will be auto generated for us and click Publish. Visual Studio will create a dockerfile and add it to your project. It will also build, package, and deploy our application to our Docker Host and launch our default browser so we can use our site. Once the publish is complete a browser will open with your application running.
At Ignite I deployed to three environments so I repeated the process to provision my QA and Prod hosts as well.
-
Create QA Docker Host
- Right-click project
- Select Publish...
- Click Profile Tab
- Select Docker Containers
- Click the New... button
- Change DNS name for QA Docker Host
- Click OK
- Click OK on Virtual Machine Creation Started dialog
-
Publish to your QA Docker Host
- Right-click project
-
Select Publish...
- This time, the Publish dialog will open on the Connection tab.
- Click Validate Connection
- Click Next
- Click Publish
-
Create Prod Docker Host
- Right-click project
- Select Publish...
- Click Profile Tab
- Select Docker Containers
- Click the New... button
- Change DNS name for Prod Docker Host
- Click OK
- Click OK on Virtual Machine Creation Started dialog
-
Publish to your Prod Docker Host
- Right-click project
-
Select Publish...
- This time, the Publish dialog will open on the Connection tab.
- Click Validate Connection
- Click Next
- Click Publish
The final step is to use Team Explorer to commit and push your changes to VSO.
-
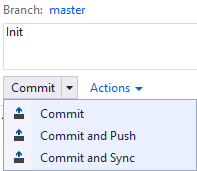
Commit and Push your changes
- Open Team Explorer
-
Open Changes
- If you have not already, click the Configure link to configure your user name and email address and return to the Changes tab.
- Review the Untracked Files and make sure everything is included in the commit except the openssl tools.
- Enter comment
-
Select Commit and Push
This will take you to the Synchronization page so we can enter the URL to our VSO Git repo. Visit the Code page of your VSO team project and copy the value presented under the “to clone this repository” section. Paste that value into the text box on the Synchronization page and click publish. When the publish is complete, return the VSO code page and press F5 to see your code in VSO. In the next post we will add xUnit test to our project.