Depending on the Azure tasks you use in your Visual Studio Team Services (VSTS) builds and releases, you will need different connections to Azure. In this post I will show you how to create an Azure Resource Manager Service Endpoint. To create an Azure Resource Service Endpoint, you first need to create a Azure Service Principal.
While we move through the creation of the service principal, be sure to copy the Application Name, Client ID, Key, Tenant ID, Subscription name, and Subscription ID.
Create Service Principal
To create a Service Principal we must first register an application in the Azure Active Directory, which we will do now. As of this writing this can only be done in the original Azure portal. However, many of us are being forced into the new portal upon login. If you are, simply click on Browse and select Active Directory and you will be redirected to the original Azure portal.
- Click on Applications of the selected Active directory
- Click the Add button at the button of the page
- Enter a name for your application and make sure Web Application and/or Web API is selected
- Enter two URLs based on your application name
They do not have to be real. I used the same value for both. - Once the application is created, click on Configure
- Make note of the Client ID because we will need it in a moment
- Select a key duration under the keys section and click Save at the bottom of the page
- Once the key is saved copy the value and place it with your Client ID
This will be your only chance to collect this value.
Find Tenant ID
With the Active Directory select on the Applications page, we can harvest the Tenant ID.
- Click View Endpoints at the bottom of the page
- Copy any of the URLS and paste into an editor
- The GUID in the URL is your Tenant ID
Find Subscription Name and ID
You will also need the subscription name and ID to complete the service endpoint. We can get them while we are in the old portal.
- Click Settings in the left vertical menu
- Copy the Subscription and Subscription ID values
Grant access
Now that we have a service principal we need to give it access to create resources in your subscription. Return to the new Azure Portal.
- Click Browse and select Subscriptions
- Select the subscription you are using
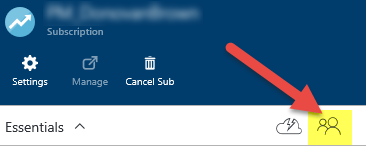
- Click the Access button
- Click Add
- Select Contributor as the roll
- Search and select the name of the application you just created
- Click OK to grant the service principal access to your subscription
There is a script that can do all of this for you here on GitHub.
Create Service Endpoint
With the Service Principal created, we can now create the Service Endpoint in VSTS.
- Log in to VSTS and select a project
- Click the manage project gear icon in the upper right hand corner of the page
- Select the Services tab
- Select Azure Resource Manager from the New Service Endpoint drop down
| Field | Value |
| Connection Name | {AnyValueYouLike} |
| Subscription Id | Subscription Id |
| Subscription Name | Subscription Name |
| Service Principal Id | Client Id |
| Service Principal Key | Key |
| Tenant Id | Tenant Id |
- Click OK