While giving a webinar on DevOps with Visual Studio Team Services, I was asked if you could build VB6 applications. My response was simple. Visual Studio Team Services can be used to build any language, targeting any platform. That is true but I wanted to prove it. So in this post I will show you how to build a VB6 application using Visual Studio Team Services. The information here should help you build any language, targeting any platform, with Visual Studio Team Services.
The first thing you will have to do is create a private agent. Visual Studio Team Services provides hosted build agents running in Azure. However, VB6 is not installed on those machines. Therefore, to build VB6 applications you are going to have to create a machine that has VB6 and the Visual Studio Team Services build agent on it. Whenever I create a build machine I start with a Azure VM using the latest Visual Studio Community template. As of this writing, that was Visual Studio Community 2015 Update 2 with Universal Windows Tools and Azure SDK 2.9 on Windows Server 2012 R2.
Once the machine is provisioned and running in Azure RDP to the machine so we can start installing VB6 and the build agent. Installing VB6 on Windows Server 2012 R2 is an involved process which I will detail now.
![image[3] image[3]](http://www.donovanbrown.com/image.axd?picture=image%5B3%5D_thumb.png) Disable IE Enhanced Security Configuration
Disable IE Enhanced Security Configuration - Download Visual Basic 6.0 Enterprise ISO from your MSDN subscription
- Download Visual Basic SP6 from here
- Right-click the ISO
- Select Mount
- Right-click setup.exe from the mounted drive
- Select Properties
- Click the Compatibility tab
- Check the Run this program in compatibility mode for: checkbox
- Select Windows XP (Service Pack 3)
- Click Apply
- Click OK
- Right-click on setup.exe
- Select Run as administrator
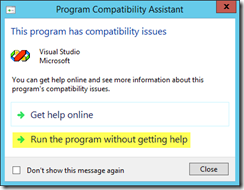 Click Run the program without getting help
 - Click Next
- Select I accept the agreement
- Click Next
- Enter your product ID (download from MSDN)
- Click Next
- Click Next
- Click Run the program without getting help
- Click Continue
- Click OK
- Click Custom
- Uncheck Microsoft Visual SourceSafe 6.0
- Click Continue
This is where things get interesting. This installation will eventually hang updating the system.
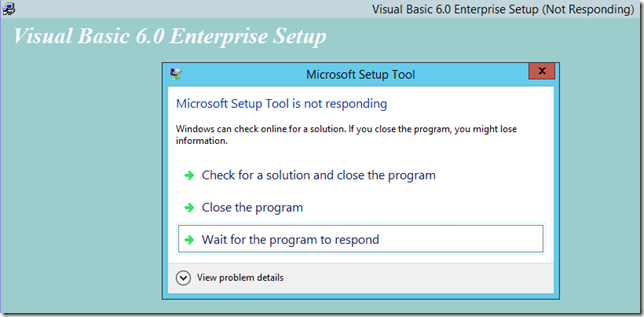
Once you reach this point, kill the installation and restart your machine. Once your machine restarts:
- Right-click the ISO and select Mount
- Right-click on setup.exe
- Select Run as administrator
- Click Run the program without getting help
- Click Next
- Select I accept the agreement
- Click Next
- Enter your product ID (download from MSDN)
- Click Next
- Click Next
- Click Run the program without getting help
- Click Continue
- Click OK
- Click Custom
- Uncheck Microsoft Visual SourceSafe 6.0
- Select Data Access
- Click Change Options
- Uncheck everything except Data Environment
- Click OK
- Click Continue
This time the installation should complete as expected. - Click Restart Windows
Now we need to install Service Pack 6.
 Right-click on vb6sp6b.exe
- Select Properties
- Click Unblock
- Click OK
- Right-click on vb6sp6b.exe
- Select Run as administrator
- Enter C:\Users\{user}\Downloads\temp
- Click OK
- Click Yes
- Right-click setupsp6.exe from the C:\Users\{user}\Downloads\temp folder
- Select Properties
- Click the Compatibility tab
- Check the Run this program in compatibility mode for: checkbox
- Select Windows XP (Service Pack 3)
- Click Apply
- Click OK
- Right-click on setupsp6.exe
- Select Run as administrator
- Click Continue
- Click I Agree
The installation should complete as expected.
The final step for VB6 is to make sure the installation folder is in the path and VB6 is registered as a capability.
- Open Windows Explorer
- Right-click the PC node
- Select Properties
- Click the Advanced system settings link
- Click the Environment Variables button
- Double-click Path in the System variables list
- Append ;C:\Program Files (x86)\Microsoft Visual Studio\VB98
- Click OK
- Click New…
| Field | Value |
| Variable name | VB6 |
| Variable value | C:\Program Files (x86)\Microsoft Visual Studio\VB98 |
- Click OK
- Click OK
- Click OK
To test our installation we will create a “Hello World” program.
- Press the Windows key
- Type CMD
- Press Enter
- Type vb6
- Press Enter
If Visual Basic does not start, repeat the setup to add the installation folder to the path and restart the command window. - Select Standard EXE
- Click Open
- Change form caption to Hello World!
- From File menu, select Save Project
- Create a folder and save your project
- Close Visual Basic
We need to check this project into Visual Studio Team Services. I am going to explain how to use Team Foundation Source Control. If you prefer, you can use Git. I am just assuming if you are using VB6 you might not have made the move to Git just yet.
- Log into Visual Studio Team Services
- Click New
| Field | Value |
| Project name | {anything you like} |
| Description | {anything you like} |
| Process template | {anything you like} |
| Version Control | Team Foundation Version Control |
- Click Create project
- Click Navigate to project
- Click Add Code
With our team project and Team Foundation Version Control repository created, we can add our code to Visual Studio Team Services.
- Start Visual Studio 2015
- Click Team Explorer tab
- Click Manage Connections
- Click Connect to Team Project
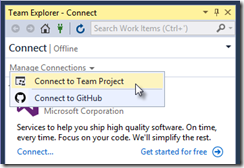
- Select your server, collection, and project
- Click Connect
- Click Configure your workspace

- Click Map & Get
- Open Source Control Explorer
- Copy your Hello World project into the mapped folder
- Click the Add Items to Folder

- Select the folder for your project
- Click Finish
- Right-click the new folder
- Select Check In Pending Changes
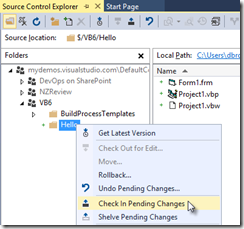
- Click Check In
With Visual Basic 6.0 Enterprise installed and our project in Visual Studio Team Services, we can now install the build agent.
- Return to Visual Studio Team Services
- Click the Manage project gear in the upper right-hand corner of the screen
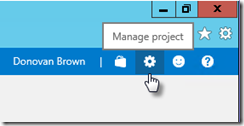
- Click your account name

- Click Agent queues tab
- Click Download agent
- Save the file to your Downloads folder
- Right-click agent.zip
- Select Properties
- Ensure the file is unblocked
- Click OK
With the zip downloaded, we can use it to stamp out agents.
- Right-click agent.zip
- Select Extract All
- Enter c:\a1
- Click Extract
I number my folders because you can have multiple agents installed on a single machine. I tend to install one agent per core.
- Press the Windows key
- Type CMD
- Right-click Command Prompt
- Select Run as administrator
- Navigate to the folder where you extracted the file contents
- Run ConfigureAgent.cmd
You can either use the default name or have the name match the folder name, which in my case is “a1” - Now enter your Visual Studio Team Services URL (https://{account}.visualstudio.com)
- Press Enter
- Press Enter
- Press Enter
- Sign in to your Visual Studio Team Services account
After you log in, the agent will be configured and begin running. If you return to your Visual Studio Team Services account, you will see your new agent listed.
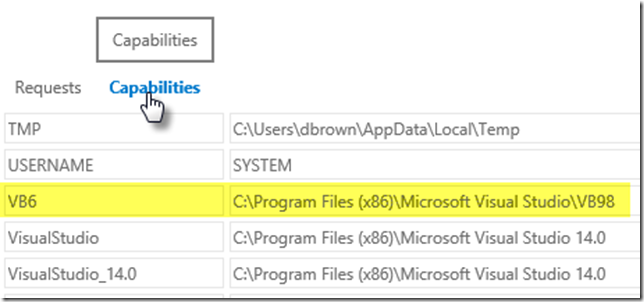
- Select the agent
- Click Capabilities
- Confirm the VB6 capability was listed
Now to the easy part: creating the build to compile our VB6 application.
- Click the Build hub
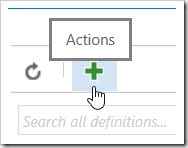
- Click the green plus
- Select the Empty template
- Click Next
- Select your repository
- Check the box for Continuous integration
- Select Default agent queue
- Click Create
With the build created, we need to add the required tasks.
- Click Add build step…
- Select the Utility category
- Click Add next to the Command Line task
- Click Add next to the PowerShell task
- Click Add next to the Copy and Publish Build Artifacts
- Click Close
- Select the Command Line task
| Field | Value |
| Tool | vb6 |
| Arguments | /m /out errors.txt {project}.vbp |
| Working folder | [Browse to folder with {project}.vbp] |
| Fail on Standard Error | [Checked] |
You must use /out or a dialog will be display on any error and your build will hang. - Select the PowerShell task
| Field | Value |
| Type | Inline Script |
| Inline Script | if(Test-Path .\errors.txt)
{
$file = Get-Content .\errors.txt
Remove-Item .\errors.txt
if($file | Select-String "succeeded." -quiet) { exit 0 }
$file | Where-Object {Write-Host "##vso[task.logissue type=error]$_"}
}
|
- Select the Copy and Publish Build Artifacts task
| Field |
Value |
| Contents |
*.exe |
| Artifact Name |
drop |
| Artifact Type |
Server |
- Click Repository tab
- Update Mappings to project folder
- Delete cloaked entry
- Click Trigger tab
- Update Filters to project folder
- Click General tab
- Click Add Demand
| Field |
Value |
| Name |
VB6 |
| Type |
exists |
This makes sure that only the agent that has Visual Basic 6.0 installed is selected to run this build.
- Click Save
- Name build
- Click OK
- Click Queue build…
- Click OK
Once the build is done you can browse the artifact to see the exe produced by the build.
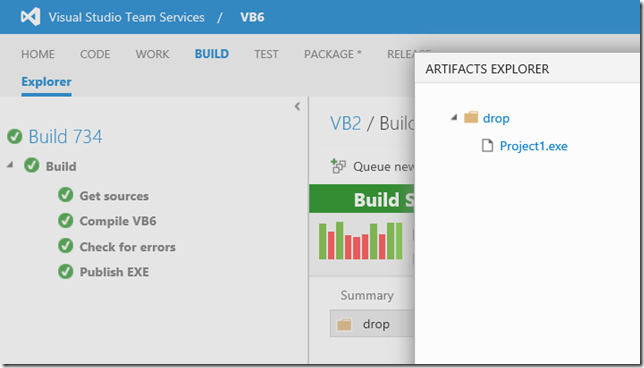
You can use this technique to build any language using Visual Studio Team Services.