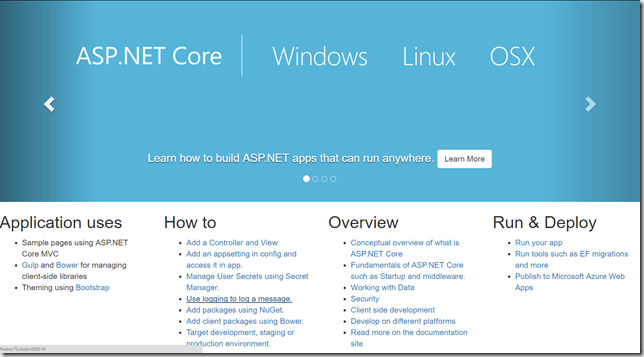
Picking up where I left off in How to Build ASP.NET Core RC2 Code with Visual Studio Team Services, we are going to extend this to support the out of the box Visual Studio Build task, run unit tests, and deploy to Azure.
I will assume you have read and completed the previous post. In this post, instead of calling the dotnet command line tool to build our project, we are going to use the out of the box Visual Studio Build task. To do that we are going to need to add another package to your private agent that we built in the previous post.
- RDP into your build agent
- Install the Visual Studio official MSI Installer on your build machine from here
This will make sure all the required target files are installed so we can use the out of the box Visual Studio Build task to build our solution. I want to use this task so that in future posts we can add UI test and database projects and build everything with a single task.
On your development machine make sure you install the .NET Core RC2 SDK as well. Instructions on how to set up your development machine are here. With your development machine running Visual Studio 2015 Update 2 and with the .NET Core RC2 SDK installed, we can begin by creating our web application.
- Start Visual Studio
- Select File / New / Project…
- Select .NET Core category under Visual C#
- Select ASP.NET Core Web Application (.NET Core)
- Click OK
- Select Web Application
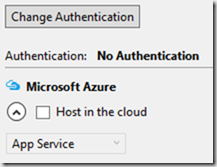
- Click Change Authentication
- Select No Authentication
- Click OK
- Make sure Host in the cloud is unchecked
- Click OK
With the web application created, we can now add our test project.
- Right-click on src folder
- Select Add / New Project…
- Select .NET Core category under Visual C#
- Select Class Library (.NET Core)
- Add .Tests to the name of the project
- Click OK
Now that we have our class library, we need to add xUnit.
- Open project.json from the class library project
- Replace the contents of the file with the JSON below
{
    "version": "1.0.0-*",
    "testRunner": "xunit",
    "dependencies": {
        "xunit": "2.1.0",
        "dotnet-test-xunit": "1.0.0-rc2-build10015"
    },
    "frameworks": {
      "netcoreapp1.0": {
         "dependencies": {
            "Microsoft.NETCore.App": {
               "type": "platform",
               "version": "1.0.0-rc2-3002702"
            }
         },
         "imports": [
            "dnxcore50",
            "portable-net45+win8"
         ]
      }
    }
}
- Save file
- Right-click references of the test project
- Select Add Reference…
- Select the Project / Solution section
- Check the box next to your web project
With the dependencies added, we can now write our first test.
- Open Class1.cs
- Add the following using statements:
using {YourProrjectName}.Controllers;
using Microsoft.AspNetCore.Mvc;
using Xunit;
- Add the code below to the file:
[Fact]
public void Index()
{
   // Arrange
   var target = new HomeController();

   // Act
   var result = target.Index() as ViewResult;

   // Assert
   Assert.NotNull(result);
}
Now we have a web application and unit tests. We can now check into Team Services and start creating our build and release definitions. You can use either Git or TFVC.
- Open Team Explorer
- Check your code into Team Services
With your code checked in, we can focus on our build. We are going to need a task to zip up the publish folder to deploy to Azure. You can get access to a zip task using the Trackyon Advantage extension. This extension is a collection of tasks to enable DevOps for any language targeting any platform.
- Visit https://marketplace.visualstudio.com/items?itemName=Trackyon.trackyonadvantage
- Click Install
- Select your account
- Click Continue
- Click Confirm
- Click Proceed to the account
Now with Trackyon Advantage installed, we can create our build.
- Click the Build hub
 in Visual Studio Team Services
- Click the green plus
- Select the Empty template
- Click Next
- Select your repository
- Check the box for Continuous integration
- Select Default agent queue
- Click Create
With the build created, we need to add the required tasks.
 Click Add build step…
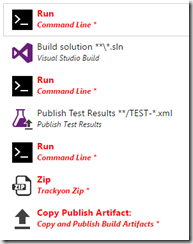
 - Click Add next to Visual Studio Build task
- Select the Utility category
- Click Add next to Command Line task three (3) times
- Click Add next to Trackyon Zip
- Click Add next to Copy and Publish Build Artifacts
- Select the Test category
- Click Add next to Publish Test Results
- Click Close
- Drag and drop one of the Command Line task to the top
- Drag and drop the Publish Test Results task between the other two Command Line tasks
- Select the first Command Line task
| Field |
Value |
| Tool |
dotnet |
| Arguments |
restore |
- Select the Visual Studio Build task
| Field |
Value |
| Solution |
**\*.sln |
| MSBuild Arguments |
|
| Platform |
$(BuildPlatform) |
| Configuration |
$(BuildConfiguration) |
- Select the second Command Line task
| Field |
Value |
| Tool |
dotnet |
| Arguments |
test . -xml test-results.xml |
| Working folder |
{Path to Test Project folder} |
- Select the Publish Test Results task
| Field |
Value |
| Test Result Format |
XUnit |
| Test Results Files |
**/TEST-*.xml |
- Select the third Command Line task
| Field |
Value |
| Tool |
dotnet |
| Arguments |
publish -c $(BuildConfiguration) |
| Working folder |
{Path to Web Project folder} |
- Select the Trackyon Zip task
| Field |
Value |
| Folder to Zip |
src/{Project Name}/bin/$(BuildConfiguration)/netcoreapp1.0/publish |
| Path to final Zip File |
website.zip |
- Select the Copy and Publish Build Artifacts task
| Field |
Value |
| Contents |
**/*.zip |
| Artifact Name |
drop |
| Artifact Type |
Server |
- Click Variables tab
- Add the following variables:
| Name |
Value |
| BuildConfiguration |
release |
| BuildPlatform |
any cpu |
- Click General tab
- Click Add Demand
| Field |
Value |
| Name |
ASP.NET_Core |
| Type |
equals |
| Value |
RC2 |

This makes sure that only the agent that has ASP.NET Core RC2 installed is selected to run this build.
- Click Save
- Name build
- Click OK
- Click Queue build…
- Click OK
Once the build is done, you can verify the test results were published and browse the artifact to see the zip produced by the build. Now from the build summary we are going to create our release to deploy our code into Azure.
 From the build summary, click the Create release link under Deployments
- Click Yes
- Select Azure Website Deployment
- Click Next
- Check the Continuous Deployment checkbox
- Select either Default or Hosted agent queue
- Click Create
| Field |
Value |
| Azure Subscription |
Select certificated based subscription. If you do not have one click Manage and follow the directions on the Creating an Azure Service Endpoint with a Certificate blog post. |
| Web App Name |
{Name for your site} |
| Web App Location |
Select region near you or your users |
 Enter a name for your release definition
- Click Save
- Click Release
- Select Create Release
- Select the build we just completed
- Click Create
- Click the release link
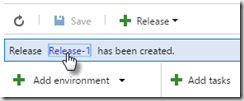
- Click Logs to watch the release log
Once the release is complete, you can navigate to your new site running in Azure.
