There is a much easier way to do this now. You can read how here Setting up CI/CD with the TFS Plugin for Jenkins
In a previous post I showed how you could trigger a release from Jenkins using the Release Management REST API. Since that post, the REST for Release Management as changed so I wanted to write and update. Instead of just duplicating that post I decided to take it a step further and have the Jenkins build automatically trigger when I commit code to Visual Studio Team Services (VSTS). This would give us a full CI/CD pipeline with Jenkins and VSTS. In this post I will show you the pieces needed to enable full CI/CD using Jenkins and VSTS.
Before I begin I will state some assumptions:
- You have a working Jenkins installation with the following plugins:
- Credentials
- Get client
- Git
- Post-Build Script
- PowerShell
- You have a VSTS account
- Your code will be in VSTS Git repository
- The attached PowerShell file is in the root of your repository
We are going to begin and end this post in Jenkins. Step one is to create an empty Freestyle project in Jenkins to wire up to VSTS.
- Log into Jenkins
- Click New Item
| Field Name | Value |
| Item name | Jenkins CI-CD |
- Select Freestyle project
- Click OK
You can leave this tab open and perform the next steps in a new tab of your browser. We just needed a Jenkins build to configure VSTS against. We will return to this tab to complete the build at the end of the post.
To connect Jenkins to VSTS so it can clone the Git repository and authenticate during our REST calls, we are going to need to create a Personal Access Token.
- Log into VSTS
- Click your name in the upper right-hand corner
![image_thumb[15] image_thumb[15]](http://donovanbrown.com/image.axd?picture=image_thumb%5B15%5D_thumb.png)
- Click My security
- Click Add
- Enter appropriate values
- Click Create Token
- Copy the token value and store it somewhere safe

Now create a Service Endpoint in VSTS to connect to your Jenkins installation.
- Log into VSTS
- Navigate to a Team Project
- Click the Manage Project gear icon in the upper right-hand corner

- Click the Services tab
- Click New Service Endpoint
- Select Jenkins
| Field Name | Value |
| Connection Name | Jenkins |
| Server URL | {your full Jenkins URL} |
| Username | {Jenkins user name} |
| Password | {Jenkins password} |
- Click OK
Next we will create the release we are going to want to trigger from Jenkins.
- Log into VSTS
- Navigate to a Team Project
- Click Release
- Click the Create Release Definition plus button
- Select Empty template
- Click OK
- Enter a name for your definition
- Click the Link to a build definition link
- Select Jenkins in the Type dropdown
- Select the desired Project from the Source (Job) dropdown
- Click Link
- Click the ellipses of the Default Environment
- Select Deployment conditions…
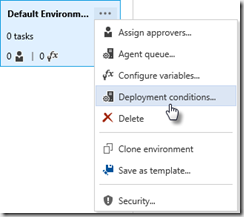
- Select After release creation for Trigger
- Click OK
- Save your release
Once your release is saved, you can locate the release definition id from the address bar.

We will use this number to make a REST API call to gain access to the other ids we need to trigger a release. Using the definition id, access this URL:
https://{instance}.vsrm.visualstudio.com/DefaultCollection/{project}/_apis/Release/definitions/{id}
You will need to locate the environment id and the artifact id.
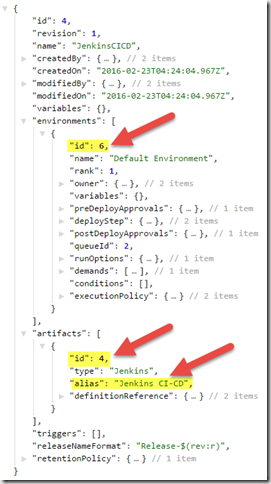
Next we are going to connect our Jenkins and VSTS via a Service Hook. This will allow communication so Jenkins can be triggered from a commit to VSTS.
- Log into VSTS
- Navigate to a Team Project
- Click the Manage Project gear icon in the upper right-hand corner

- Click Service Hooks
- Click the + button
- Select Jenkins
- Click Next
| Field Name | Value |
| Trigger on this type of event | Code pushed |
| Repository | {your repository} |
| Branch | [Any] |
| Pushed by a member of group | [Any] |
- Click Next
| Field Name | Value |
| Perform this action | Trigger generic build |
| Jenkins base URL | {your full Jenkins URL} |
| Username | {Jenkins username} |
| User API token (or password) | {Jenkins password} |
| Build | {Build created above} |
- Click Finish
We will now update the Jenkins build. We will only cover the parts needed to talk to VSTS. I will leave the build steps to build your project for you to configure.
- Return to the Jenkins tab
-
- Click Add next to Credentials

| Field Name | Value |
| Kind | Username with password |
| Scope | Global (Jenkins, nodes, items, all child items, etc) |
| Username | {your vsts username} |
| Password | {personal access token} |
| Description | Jenkins Access Token from VSTS |
- Click Add
- Select the new credentials
- Click Add post-build action
- Select Archive the artifacts
| Field Name | Value |
| Files to archive | **/* |
- Click Add post-build action
- Select Execute a set of scripts
- Click Add build step
- Select Windows PowerShell
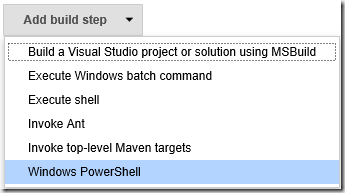
- Copy and paste the code below into the Command text box
$EnvWORKSPACE = 'WORKSPACE'
$EnvBUILD_NUMBER = 'BUILD_NUMBER'
$workspace = (get-item env:$EnvWORKSPACE).Value
$build_number = (get-item env:$EnvBUILD_NUMBER).Value
invoke-expression ".\TriggerRelease.ps1 -TfsCollectionUri https://{instance}.vsrm.visualstudio.com/DefaultCollection -TeamProject {TeamProject} -ReleaseDefinitionId {ReleaseDefinitionId} -TargetEnvironmentId {TargetEnvironmentId} -BuildNumber $build_number -artifactAlias '{artifactAlias}' -artifactId {artifactId} -personalAccessToken {personalAccessToken}"
- Update the Instance, Team Project, Release Definition Id, Target Environment Id, Artifact Alias, Artifact Id, and Personal Access Token
- Click Save
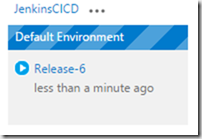
Now all you have to do is commit a change to VSTS and Jenkins will build the code and trigger a release. When you do, the Service Hook we created will inform Jenkins, who will start a build.
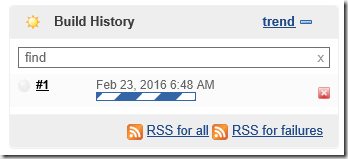
Jenkins will pull the code from the VSTS Git repository using the Personal Access Token we created and build your project. Finally Jenkins will use the PowerShell script to call the Release Management REST API to trigger the release.
TriggerReleaseV2.ps1 (3.8KB)