While on vacation I decided to learn Python and get into Quant trading. One of the first things you have to do is setup a Python development environment. I figured instead I would take a shortcut and use GitHub Codespaces instead. The default image for Codespaces already has Python installed and Anaconda!
All the training I have found has you create a virtual environment for your development. I always have to look this up so I thought why not create a post that puts all the information in one place.
To begin I created a private repo on GitHub and called it LearnPython.
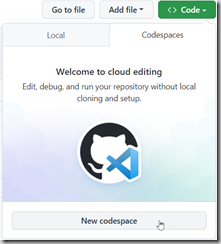
Then I used the <> Code dropdown to create a new codespace.

Once my codespace was running I ran the following command to update my Anaconda installation.
conda update conda
Once the command was complete it was time to create my virtual environment. To do that I used the conda create command.
conda create -n quant
Next I ran conda activate quant to activate my environment and got this message.

My codespace defaulted to using bash so I ran the following command.
conda init bash
I used the trash can icon to terminate my terminal and created a new one.

Now when I run conda activate quant I get the expected results!

Now I am off to become a quant trader!