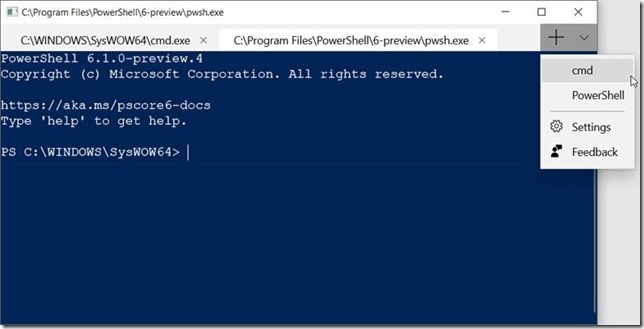
I saw a tweet from Martin Woodward about the new Windows Terminal. The video looked awesome and I wanted to play with it. The only way to get your hands on it now is to build it yourself. I found my way to the GitHub repo.
There you quickly learn the requirements. First thing I had to do was install the Insider build of Windows to get to version 1903. To do this I logged into VisualStudio.com and clicked the “Visual Studio Profile” link under my avatar.
![clip_image002[4] clip_image002[4]](http://donovanbrown.com/image.axd?picture=clip_image002%5B4%5D_thumb.jpg)
From there I clicked the “Use your benefits” link.
![clip_image004[4] clip_image004[4]](http://donovanbrown.com/image.axd?picture=clip_image004%5B4%5D_thumb.jpg)
Click “Downloads” from the top menu then “Windows 10”. I filtered the product family to only show “Windows 10, version 1903”. From the list download either “Windows 10 (consumer editions), version 1903” or “Windows 10 (business editions), version 1903” depending on your version of Windows. Once downloaded mount the ISO and run the setup program.
Once you have updated your version of Windows you need to make sure you have all the required components installed in Visual Studio 2019 which are:
- "Desktop Development with C++"
- "Universal Windows Platform Development"
- Windows SDK version 10.0.18362.0
The readme also calls out "v141 Toolset". I had zero luck getting the solution to build with that toolset. By default, Visual Studio 2019 installs v142. We are going to retarget the solution to v142 instead of installing v141.
With the required packages installed you are ready to clone and build the solution.
Make sure after you clone the repo you also clone the submodules using the following command:
git submodule update --init --recursive
Now open OpenConsole.sln in Visual Studio 2019. After the solution opens you will be prompted to retarget projects to v142. For the “Windows SDK Version” select “10.0.18362.0”. Leave the “Platform Toolset” set to “Upgrade to v142”. Click OK. I noticed after this process some of my projects in the solution were not upgraded.
Only the items with checks next to them were upgraded.
![clip_image006[4] clip_image006[4]](http://donovanbrown.com/image.axd?picture=clip_image006%5B4%5D_thumb.jpg)
Before you try and build make sure you select the correct platform to match your machine.
![clip_image010[4] clip_image010[4]](http://donovanbrown.com/image.axd?picture=clip_image010%5B4%5D_thumb.jpg)
If you attempt to build the solution now you will get a lot of errors.
error MSB8020: The build tools for Visual Studio 2017 (Platform Toolset = 'v141') cannot be found.
To build using the v141 build tools, please install Visual Studio 2017 build tools. Alternatively, you
may upgrade to the current Visual Studio tools by selecting the Project menu or right-click the solution,
and then selecting "Retarget solution".
The error message says you can just right-click the project and select Retarget. But that just failed so I am going to do it manually. Right-click on each project under "Terminal" that had a padlock and select “Properties”. From the “General” tab change the “Platform Toolset”.
![clip_image008[4] clip_image008[4]](http://donovanbrown.com/image.axd?picture=clip_image008%5B4%5D_thumb.jpg)
You should be able to build the solution now. If you get an error about a missing header file right-click on the “TerminalSettings” project and build it first. Now try and build the solution again.
Right-click on the “CascadiaPackage” project and select “Set as Startup Project”. Right-click the project again and select Deploy.
Now you can run the application. Don’t be alarmed when it looks just like the normal terminal. Just press Ctrl+T to show the tabs.
