While working on yo TFS I needed a Service Principal to create an Azure Resource Manager Service Endpoint. Depending on the Azure tasks you use in your Team Foundation Server (TFS) builds and releases, you may need this information as well. In this post I will show you how to create an Azure Service Principal using the new Azure Portal.
While we move through the creation of the Service Principal, be sure to copy the Application ID, Key, Tenant ID, Subscription name, and Subscription ID.
Create Service Principal
To create a Service Principal we must first register an application in the Azure Active Directory, which we will do now.
- Visit the Azure Portal
- Click More services
- Filter for Azure Active Directory

- Click App registrations of the selected Active directory
- Click the Add button at the top of the blade
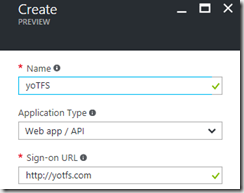
- Enter a name for your application and make sure Web app / API is selected
- Enter Sign-on URL based on your application name
It does not have to be real.

- Click Create
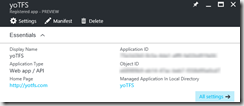
- Once the application is created take note of the Application ID
When we create our Service Endpoint this will be the Service Principal ID

- Click Keys
- Enter a Key description
- Select a key duration
- Click Save at the top of the blade
- Once the key is saved copy the value and place it with your Client ID
This will be your only chance to collect this value.
Find Tenant ID
With the Active Directory blade open, we can harvest the Tenant ID.
- Click Properties
- The Directory ID is your Tenant ID

Find Subscription Name & ID and Grant access
You will also need the subscription name and ID to complete the service endpoint.
- Click More services
- Filter for Subscriptions

- Copy the Subscription and Subscription ID values
- Select the subscription you are using
- Click Access control (IAM)
- Click Add
- Select Contributor as the roll
- Search and select the name of the application you just created
- Click Select
- Click OK to grant the service principal access to your subscription
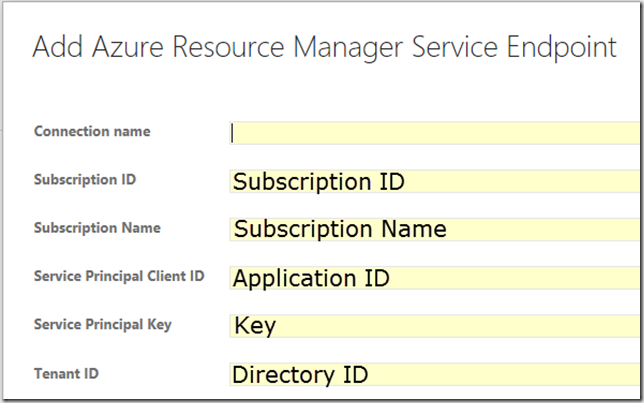
When it comes time to create the Service Endpoint you have to make sure and map all the data found to the correct location. You can use the image below to help.
