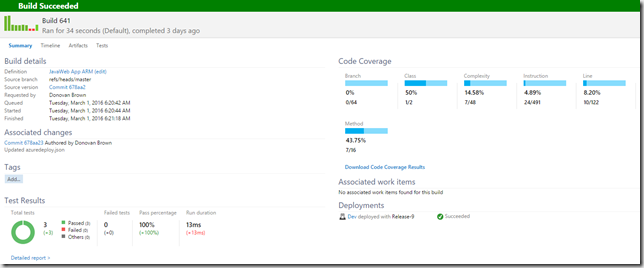
My goal in this post is to build, test, and deploy a Java project using Maven into an Azure Web App running Tomcat 8 and Java 8, execute jUnit tests, and publish code coverage results. I will be using Azure Resource Manager templates to provision the Web App during my release pipeline and JaCoCo to calculate code coverage during my build. While I was building this demo I ran into a problem. Although a WAR file is just a zip file, using it as the value for the Web Deploy Package field of the out of the box Deploy Web App Deployment task failed.
2016-03-01T00:50:29.0940661Z ##[error]Package file 'C:\a1\_w\8f0ccb3f6\JavaWeb App ARM\drop\target\PeopleTracker.JavaService.war' does not have a .zip file name extension.
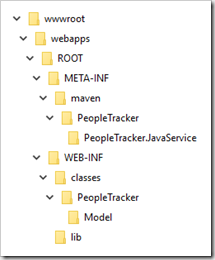
That error seemed easy enough to fix. I will just change the extension to .zip and everything should be fine. Unfortunately, the structure of the WAR file did not match the directory structure expected by the Azure Web App. With a Web App, the zip file uploaded is expanded starting from the site\wwwroot folder.
The problem with that is we are missing two folders webapps and ROOT which start the folder structure of a Azure Web App configured with Tomcat 8 and Java 8. Therefore, we have to restructure the WAR file to start at webapps\ROOT and be a .zip file instead of .war file. That way when it expands we will end up with the desired folder structure.
I have been doing a lot of work with writing custom Node.js tasks for Visual Studio Team Services (VSTS) and thought this was a great opportunity to use that knowledge. I will write future posts on how I created the task. For now you can simply install the tasks from the Visual Studio Team Service Marketplace as the Trackyon Advantage extension.
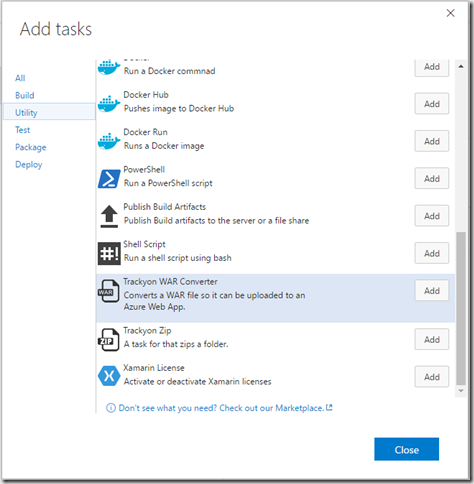
The current version of the task simply extracts the contents of the WAR file and re-zips it in the desired folder structure with a .zip extension. Future plans are to support Tokenization of files before it is re-zipped.
Now we can configure your build. You can use any Maven project that produces a WAR file. You will need to add an Azure Resource Manager (ARM) template to your source repository. You can my 201-web-app-java-tomcat ARM template from GitHub. Simply add the azuredeploy.json file to your repository. You can add it anywhere you like. I created an ARM folder and placed it there.
With all your code in source control, we can now create our build definition.
- Log in to VSTS
- Click the Build hub
- Click the green plus
- Select the Empty template
- Click Next
- Select your repository
- Check the box for Continuous integration
- Click Create
With the build created, we need to add the required tasks.
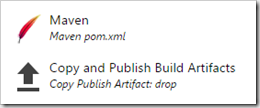
- Click Add build step…
- Select the Build category
- Click Add next to the Maven task
- Select the Utility category
- Click Add next to the Copy and Publish Build Artifacts task
- Click Close
With the tasks added, we can now configure each task.
- Select the Maven task
- Browse to the desired pom.xml file
- Select JaCoCo for Code Coverage Tool
- Select the Copy and Publish Build Artifacts task
| Field |
Value |
| Contents |
**/*.war
**/*.json |
| Artifact Name |
drop |
| Artifact Type |
Server |
- Click Save
- Give your build a name
- Click OK
- Click Queue build…
- Click OK
Verify that the build completes successfully. Now we can create our release.
- Open build summary

- Click Create release from the Deployments section
- Click Yes
- Select the Azure Website Deployment template
- Click OK
- Click Add tasks
- Select the Utility category
- Click Add next to the War Converter task
- Select the Deploy category
- Click Add next to the Azure Resource Group Deployment task
- Drag and drop the War Converter task to the top
- Drag and drop the Azure Resource Group Deployment task above the Azure Web App Deployment task
- Delete the Visual Studio Test task
With the tasks added, we can now configure each task.
- Select the Azure Resource Group Deployment task
| Field |
Value |
| Azure Connection Type |
Azure Resource Manager |
| Azure RM Subscription |
Select your Azure RM Subscription
If you do not have a Azure RM Subscription, you can click Manage to add one. For step-by-step instructions on adding an Azure RM Subscription, follow this blog post: Creating an Azure Resource Manager Service Endpoint. |
| Resource Group |
Select an existing Resource Group or type in a name of one you would like created |
| Location |
Select location to create your Resource Group |
| Template |
Click the browse button for the Template and select the json file added from GitHub |
| Override Template Parameters |
-webSiteName {DesiredWebSiteName} -hostingPlanName {DesiredHostingPlanName} |
- Select the Azure Web App Deployment task
Now we are going to configure our environment to deploy as soon as a release is created.
- Click the ellipse of the Default Environment
- Select Deployment Conditions…
- Select the After release creation radio button
- Click OK
- Click the Triggers tab
- Select the Continuous Deployment radio button
- Select the build definition we created earlier
- Enter an name for your release Definition
- Click Save
Now we can test everything by starting a new release.
- Click Release
- Select Create Release
- Select the build we ran to test our build definition
- Click Create
- Click the release link
- Click the Logs tab
Verify that the release completes successfully. This pipeline demonstrates how to use Infrastructure as Code to provision a Tomcat 8 Azure Web App and deploy a Java application built with Maven using VSTS. It also shows the integration of build and release and support for Java, jUnit, JaCoCo and Tomcat.
