I have found lots of information on How to Write a PowerShell Binary Module. However, information on how to setup Visual Studio to debug that module was harder to find.
In this post we will create a sample binary module using .NET Core and debug it using Visual Studio.
As of this writing I am using the following:
- Windows 10 Pro, version 1909
- PowerShell, version 7.0.3
- .NET Core, version 3.1.302
- Visual Studio Enterprise 2019, version 16.6.4
First thing I am going to do is install the PowerShell Standard based C# module template. This will make creating our sample binary PowerShell module much easier. Run the following command in a PowerShell session to install the template.
dotnet new -i Microsoft.PowerShell.Standard.Module.Template
With the template installed we can now create our sample project. Create and navigate into a folder that you want to hold your PowerShell module. For this example my folder will be called Test-SampleCmdlet. From within that folder I will run the following command.
dotnet new psmodule
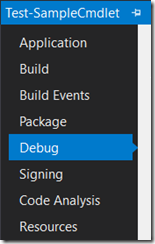
With our project created open the Test-SampleCmdlet.csproj file in Visual Studio. Right-click on the project from the Solution Explorer and select Properties. From the Properties window select the Debug tab.

Change the Launch: dropdown to Executable. Browse to your pwsh.exe. On my system it is in C:\Program Files\PowerShell\7. At this point you can start a debug session and Visual Studio will start and attach to a new PowerShell session and allow you to set and hit breakpoints. Once PowerShell starts you will first have to import your module using the Import-Module cmdlet and passing in the location of the dll. However, using Application arguments you can have Visual Studio import and even execute your cmdlet for you.
Simply change your Application arguments to -NoExit -Command "& Import-Module .\Test_SampleCmdlet.dll -Verbose; Test-SampleCmdlet -FavoriteNumber 8 -FavoritePet Dog". Note the underscore in the dll name.

While starting PowerShell, Visual Studio will now pass the arguments we supplied. The –NoExit parameter will cause the PowerShell window to stay open so you can continue using it to repeat commands and continue to test. If you do not provide –NoExit the PowerShell window will immediately close after running the command. Next we pass the –Command parameter to import and execute our cmdlet.
You can now set a breakpoint in your source files.

Starting a debug session will start PowerShell, attach, import your module and call your code. This will result in you hitting your breakpoint.

Now you are ready to complete your module!