I recently built a pipeline that deploys 100% of the infrastructure including updating DNS records. I wanted a way to test that the DNS propagation had occurred before I proceed to run my integration tests. Using Azure DevOps I was able to configure a Release Gate that would poll my FQDN until it got a 200 response.

In this post I will show you how I configured it.
To learn more about release gates in general you can visit Release deployment control using gates. We are going to use the Invoke REST API gate for this post. This gate simply issues a HTTP request and succeeds if it gets a 200 response. This is perfect to determine if my application is accessible. In my case the site did not exist at time zero. Therefore, the URL never returned. If you are changing the DNS recorded from one IP address to another you will need a more sophisticated solution. What I am showing you here works great when you are recovering from a disaster or starting from scratch. If you are changing you need to compare what NSLookup returns to what it should be now. Just returning a 200 would not confirm the correct servers are responding.
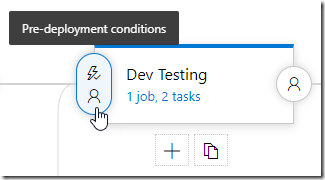
In my pipeline I decided to enable the gate as a pre-deployment gate for the stage that ran my automated UI tests. Running these tests before the DNS propagated would simply result in all the test failing. You begin by editing your release definition and clicking the “Pre-deployment conditions” section of the desired stage.
With the “Pre-deployment conditions” open enable Gates and click Add.
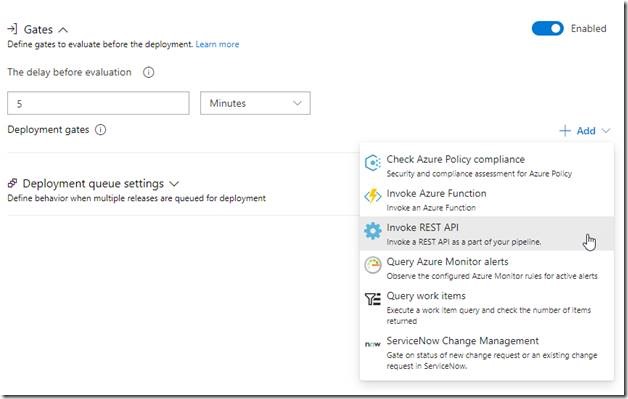
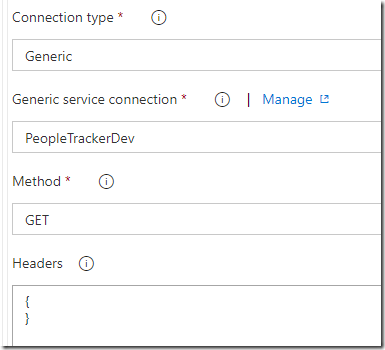
From the menu select “Invoke REST API”. Leave the “Connection type” as “Generic”. Next to the “Generic service connection” click the “Manage” link. Now on the “Service connections” page we are going to add “Generic” connections for each URL we need to test.
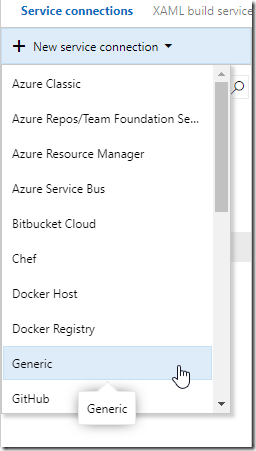
In my case I will create three (3) one for Dev, QA, and Prod.
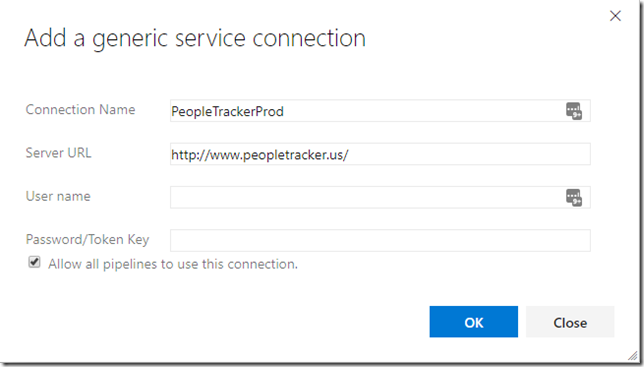
Simply name the connection and enter the URL you want to test. Because the site I am testing is a public facing anonymous site I can leave “User name” and “Password/Token key” blank and click “OK”.
With my connections added I can return to my gate.

Click the refresh button next to the dropdown list to load your connections. Select the desired connection for this gate. Change the “Method” to “GET”. Remove all the properties of the “Headers” leaving just the open and close curly braces.
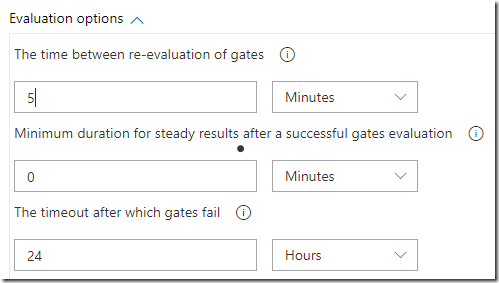
Finally, under “Evaluation options” set “The time between re-evaluation of gates” to 5 minutes.
Repeat these steps of each URL you want to test on the correct stages of your deployment. Now when you execute your release the gate will test the URL and either reject your release or let it proceed if the DNS propagates before the gate timeout.
