In this post we are going to see how we can use Team Build 2015 to create a Nuget package from a class library project and publish it to Nuget.org.
To follow along you will need:
-
Create a Class Library project in Visual Studio
- From the File menu select New / Project...
- Select Windows under Visual C#
- Select Class Library
- Name your project
- Check the check box for Add to source control
- Click OK
-
If prompted by Choose Source Control dialog choose Git
- This works with TFVC as well. TFVC is not going away and is still a valid source control choice.
- Click OK
-
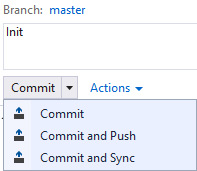
Commit and push your changes
- From the View menu select Team Explorer
- Click Changes button
- Enter a comment
-
Select Commit and Push
-
Create Service Connection to Nuget
-
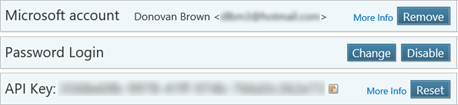
Copy nuget API Key
- Sign in to nuget.org
- Click your username
- Copy your API Key
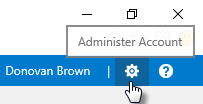
- Sign in VSO
- Browse to a Team Project
- Click the Administer Account Gear icon
- Select the Services tab
- Click New Service Endpoint
- Select Generic
- Enter Nuget.org as the Connection Name
- Enter https://nuget.org as the Server URL
- Enter your Nuget.org user name
- Copy and Paste your Nuget.org API Key into Password/Token Key
- Click OK
With our code checked into VSO and our Service Connection made to Nuget.org we can now create our build definition.
-
Create new Visual Studio Build
- Visit the Build hub of your VSO project
-
Click the Actions link
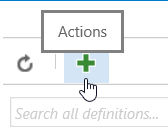
- Select the Visual Studio build template
- Click OK
-
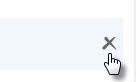
Delete Publish Build Artifacts step
- Click x next to the Publish Build Artifacts step
Because we are going to publish the package to Nuget.org there is no reason to publish the artifacts to VSO.
-
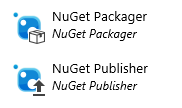
Add NuGet Packager step after Visual Studio Test step to package your project file
- Click + Add Build step…
- Select NuGet Packager from the Package section
- Drag and drop this step under the Visual Studio Test step
- Click the browse button for the Path/Pattern to nuspec files
- Select the .csproj file
- Expand the Advanced section
- Change Configuration to Package to $(BuildConfiguration)
-
Add NuGet Publisher step after NuGet Packager step to publish your package
- Click + Add Build step…
- Select NuGet Publisher from the Package section
- Drag and drop this step from the bottom to under the NuGet Packager step we added
- Set NuGet Server Endpoint to the Service Connection we created
-
Set Repository Clean to true
- Click Repository tab
- Change Clean to true
This will make sure that your nupkg files are removed from your agent. If you do not enable this you will get an error as the publish task attempts to publish previous versions to NuGet.org.
-
Set the build configuration to Release
- Click the Variables tab
- Change debug to release for the BuildConfiguration variable
-
Enable Continuous integration
- Click the Triggers tab
- Check the Continuous integration (CI) check box
-
Save your build
- Click Save
- Give your build a name
- Click OK
-
Queue a build
- Click Queue build...
- Click OK
Once the build is complete you can return to your NuGet.org account and see your new package.
Many properties of your package can be controlled by changing attributes in your project in Visual Studio. Next I will identify some of the attributes you can use.
-
Change Version of package
- Open AssemblyInfo.cs file
- Change AssemblyVersion attribute
- Change AssemblyDescription attribute
- Commit and Push changes
A CI build should have been triggered and the resulting package will have the version and description from the AssemblyInfo.cs file.
If you need additional control over the creation of your package you can add a nuspec file to your.
-
Add a nuspec file to your project.
- Right-click your project in Solution Explorer
- Select Add / New Item...
- Enter xml in the search box
- Select XML File
-
Enter {projectName}.nuspec
- Replace {projectName} with the name of your project
- Click OK
-
Copy and paste the text below into your file
<?xml version="1.0"?>
<package>
<metadata>
<id></id>
<version></version>
<title></title>
<authors></authors>
<owners></owners>
<licenseUrl></licenseUrl>
<projectUrl></projectUrl>
<iconUrl></iconUrl>
<requireLicenseAcceptance></requireLicenseAcceptance>
<description></description>
<releaseNotes></releaseNotes>
<copyright></copyright>
<tags></tags>
</metadata>
</package>
- You can learn more about nuspec files here
- Fill in the elements
- Save the file
The values in your nuspec file will be used to overwrite values during the creation of your package.