In this post we are going to use the SonarQube server we
built in the last
post. With build vNext running a Maven build is as simple as adding a
Maven build step. Any Java application you are currently building with Maven should
work to follow along with this post. The application I will be using is a
Spring MVC application that also runs jUnit tests as part of the build. When
the build is over I will be able to view the results of my SonarQube analysis
on the SonarQube server.
I would like to take a moment and thank my friend Jean-Marc Prieur
for all his help getting me going with SonarQube.
You can use TFVC as I have or Git to store your project for
use with build vNext. Once your project is in source control we can start
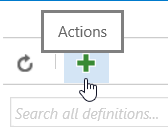
creating the build. To begin visit the Build hub of your VSO project. Now
click the Actions link.
Select the Empty build template and click OK. Now click the
Add build step link and add the Maven and Publish Build Artifacts build steps.
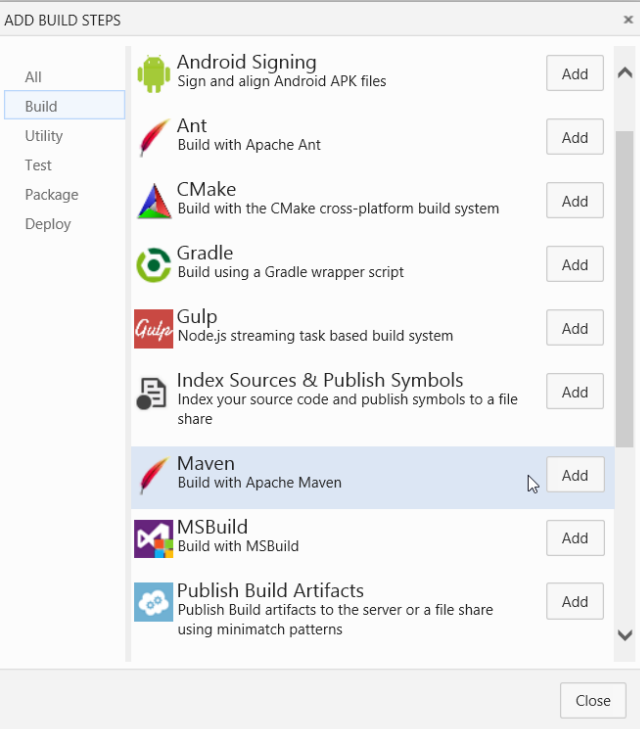
Select the Maven build step so we can fill in the values.
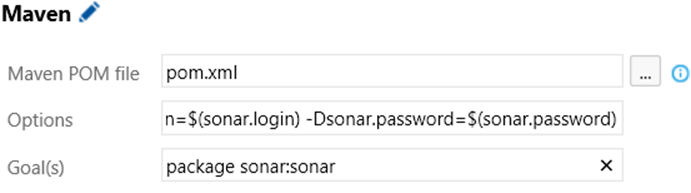
For the Maven POM file value simply type pom.xml. If you happen to have
multiple you can use the browse button to select a specific file. The options
value is where we pass the data required by SonarQube to store the results of
our analysis. Simply copy and paste the value below into the Options text
box. We will define the variables in a moment.
-Dsonar.host.url=$(sonar.host.url)
-Dsonar.jdbc.url=$(sonar.jdbc.url) -Dsonar.jdbc.username=$(sonar.jdbc.username)
-Dsonar.jdbc.password=$(sonar.jdbc.password) -Dsonar.login=$(sonar.login)
-Dsonar.password=$(sonar.password)
Each value that starts with a $ and ends with a ) is a variable
we can define on the build. This allows us to reuse the same value in multiple
places but manage them in one central location. We can also secure variables
so they are protected. We will discuss the purpose of each of the variables
when we define them.
To trigger the analysis we need to update the Goal(s) of
this step. After the package goal add sonar:sonar.
Now click on the Publish Build Artifacts step so we can
configure its values. The package goal will create a target folder which we
want to publish as an artifact on VSO. Therefore, set Contents to **\target.
The ** at the beginning instructs the system to do a recursive search for a
folder named target and to copy its contents to the artifact. You can enter
any name you like for the Artifact Name. Now select Server for the Artifact
Type.
Now we can add are required variables. Click the variables
tab to display the variables page. Click the Add variable link for each variable
in the options section of our Maven build step (6).
|
Variable Name
|
Variable Value
|
|
sonar.host.url
|
The full URL in http://{sonarServer} format to your SonarQube server.
|
|
sonar.jdbc.url
|
The full JDBC connection string in jdbc:jtds:sqlserver://{sonarServer}/{sonarDB};SelectMethod=Cursor
format to your SonarQube database.
|
|
sonar.jdbc.username
|
The username to connect to your SonarQube database.
|
|
sonar.jdbc.password
|
The password to connect to your SonarQube database.
|
|
sonar.login
|
The login to your SonarQube server. If you are not prompted to login
when you visit the SonarQube server you can leave this value empty.
|
|
sonar.password
|
The password to your SonarQube server. If you are not prompted to
login when you visit the SonarQube server you can leave this value empty.
|
If you wish to protect any of the values simply click the
lock icon next to the value.

We can speed up our build by visiting the Repository tab and
making sure we only download the portion of the code we need.
Now simply save and queue your build.

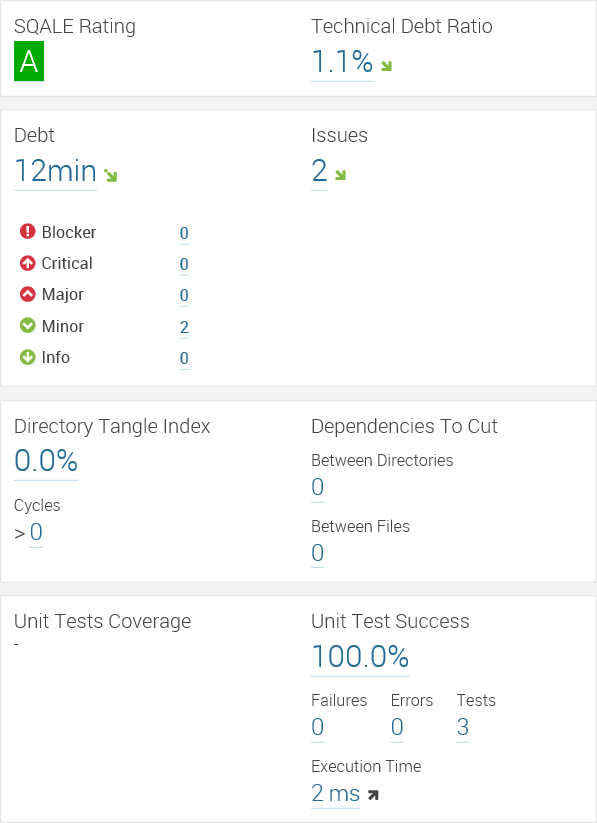
Once the build completes you will be able to view your
results on the SonarQube server.