Steps:
- Intro
- VSO
- Docker
- xUnit
- Build
- Back end
- Selenium
- Docker
- Release Management
- Testing
Using Marcel’s post as my guide, I added xUnit
tests to my demo.
-
Add a Class Library (Package) project
- Right-click the src folder
- Select Add / New Project
- Select Class Library (Package)
- Enter name PeopleTracker.Preview.Tests
- Click OK
-
Add Xunit and Xunit.Runner.Dnx packages
- Right-click the test project
- Select Manage NuGet Packages...
- Check the Include prerelease check box
- Search for Xunit.Runnder.Dnx
- Click Install
- Search for Xnuit
- Click Install
-
Add a test command in the project.json
- Open project.json
-
Copy and paste this code below the dependencies section
"commands" : {
"test": "xunit.runner.dnx -xml test-results.xml"
}
Now, we need to add a reference to the ASP.NET application in our new class library. This will provide access to the classes in the ASP.NET so we can test them from our class library.
-
Add reference in PeopleTracker.Preview.Tests to PeopleTracker.Preview
- Right-click on the References folder of class library
- Select Add Reference...
- Under the Projects section, select Solution
- Check the box next to your ASP.NET project
- Click OK
-
Add unit test
- Right-click Class1.cs
- Select Rename
- Enter HomeControllerTests and press Enter
- Click Yes
-
Replace the contents of the file with the code below
using Xunit;
namespace PeopleTracker.Preview.Tests
{
public class HomeControllerTests
{
[Fact]
public void Index()
{
// Arrange
var target = new PreviewWeb.Controllers.HomeController();
// Act
var results = target.Index();
// Assert
Assert.NotNull(results);
}
}
}
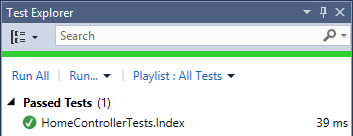
With this test in place, you can now execute it from Test
Explorer.

-
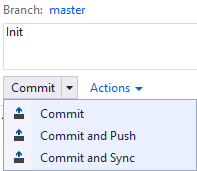
Commit and Push your changes
- Open Team Explorer
-
Open Changes
- Enter comment
-
Select Commit and Push

In the next post we will configure our build.