So you read my last post DevOps for ASP.NET Core RC2 and thought, but Donovan what about Docker? OK then, let’s deploy to Docker. This will be a continuation of the previous two posts using a private Windows-based build agent. If you have not read those, go catch up because I will assume you have.
The first thing we are going to need is a Docker host. We are going to use Docker Machine to provision our host in Azure for us. To get Docker Machine, you need to install the Docker Toolbox from here.
- Download Docker Toolbox from https://www.docker.com/products/docker-toolbox
- Double-click the exe
- Click Next
- Click Next
For our purposes, the only required options are Docker Client for Windows and Docker Machine for Windows. - Click Next
- Check Add docker binaries to PATH
- Click Next
- Click Install
- Click Finish
 With Docker Toolbox installed, we can use Docker Machine to create our host in Azure. Docker Machine requires your Azure Subscription ID to create your host so we need go get that now.
- Log in to the Azure Portal
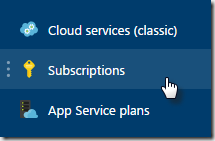
- Click Subscriptions from the menu
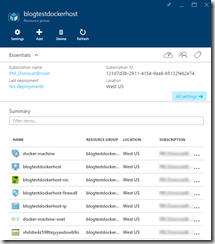
- Copy your Subscription Id
With your Azure Subscription Id, we can now create a Docker host in Azure.
- Open the Command Prompt
- Enter the following command:
docker-machine create -d azure --azure-subscription-id {Azure Subscription ID} --azure-open-port 80 --azure-resource-group {resource group name} {vm name in all lowercase}
If you care to see all the options, you can read the Azure driver docs here.
- Copy the code presented

- Visit https://aka.ms/devicelogin
- Enter the code
- Press Continue
- Log in to your Azure Subscription
Docker Machine will now generate certificates, create a Linux Virtual Machine in Azure, and configure Docker on that machine.

Using Docker Machine to switch your environment can be a little confusing at first. It might be easier to understand if you know what the command is doing. To talk to your Docker host, you use the Docker command. For the Docker command to connect to the Docker host it must know the Docker host’s address and use certificates to authenticate. The certificates are stored in a folder on your machine. When you switch environments, you are telling the Docker command where to find the correct certificates and the address of the host you want to connect to. This is done by setting environment variables the Docker command knows to look for. When you use Docker Machine to switch your environment, it just shows you the values the environment variables need to be and shows you a command to execute to set them. For example, if I use Docker Machine to connect to the host I just created, I would issue the following command:
docker-machine env blogtestdockerhost
This would return the following output:
SET DOCKER_TLS_VERIFY=1
SET DOCKER_HOST=tcp://138.91.159.75:2376
SET DOCKER_CERT_PATH=C:\Users\dbrown\.docker\machine\machines\blogtestdockerhost
SET DOCKER_MACHINE_NAME=blogtestdockerhost
REM Run this command to configure your shell:
REM     @FOR /f "tokens=*" %i IN ('docker-machine env blogtestdockerhost') DO @%i
However, I would still not be able to use the Docker command to connect to my host. If I were to try to list the images on my Docker host issuing the following command:
docker images
I would get the following error:
An error occurred trying to connect: Get http://./pipe/docker_engine/v1.23/images/json:
open //./pipe/docker_engine: The system cannot find the file specified.
The reason for the error is the Docker Machine command just showed me what the values need to be but did not set them. To set them, I need to copy the last line of the Docker Machine output starting at the @ sign. Running that command at the command prompt will actually set the environment variables so I can access the host.
@FOR /f "tokens=*" %i IN ('docker-machine env blogtestdockerhost') DO @%i

docker images
REPOSITORY          TAG                 IMAGE ID            CREATED             SIZE
Take note of the DOCKER_HOST and DOCKER_CERT_PATH values. We are going to need those when we create our Service Endpoints in Visual Studio Team Services.
With our Docker host in place, we can move to setting up Visual Studio Team Services. To make things easier, we are going to install a Docker Integration extension that has tasks for Docker.
- Visit https://marketplace.visualstudio.com/items?itemName=ms-vscs-rm.docker
- Click Install
- Select your account
- Click Continue
- Click Confirm
- Click Proceed to the account
Before we get to the build, we need to make some changes to the project.
- Open project from the previous post in Visual Studio
- Right-click the web project
- Select Add / New Item…
- Select Text File
- Name the file dockerfile
- Click Add
If the file is added with an extension, remove it. The file name is simply dockerfile with no extension.
- Copy and paste the text below into the file:
FROM microsoft/dotnet:1.0.0-rc2-core

ADD . /app

WORKDIR /app

ENTRYPOINT dotnet {projectName}.dll
Replace {projectName}.dll with the name of your output DLL. It is very important that the casing is correct. Remember we are running ASP.NET in a Linux container and Linux is case sensitive.
- Open Program.cs
- Add the following code above UseKestrel:
.UseUrls(Environment.GetEnvironmentVariable("ASPNETCORE_URLS") ?? String.Empty)

- Build the project to make sure there are no errors
- Save and check in all the files
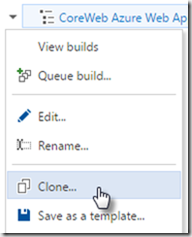
With the code in place, we can move on to creating the build. Clone the build definition we created in the last post.
 Click the Build hub in Visual Studio Team Services
 - Hover your mouse to the left of the build definition in the Explorer
- Click the down arrow
- Select Clone…
- Remove the last two tasks (Trackyon Zip and Copy and Publish Build Artifacts)
- Click Add build step…
- Select the Utility category
- Click Add next to Copy Files
- Select the Build category
- Click Add next to Docker twice (2)
We are going to build and run the image from our build. We could also move the run step to Release Management.
- Select the third Command Line task
| Field |
Value |
| Tool |
dotnet |
| Arguments |
publish -c $(BuildConfiguration) -o $(Build.StagingDirectory)/drop |
| Working folder |
{Path to Web Project folder} |
- Select the Copy Files task
| Field |
Value |
| Source Folder |
src/{Project folder} |
| Contents |
dockerfile |
| Target Folder |
$(Build.StagingDirectory)/drop |
- Select the first Docker task
- Click Manage next to Docker Host Connection
- Click New Service Endpoint
- Select Docker Host
| Field |
Value |
| Connection Name |
{Docker Host VM Name} |
| Server URL |
{The DOCKER_HOST value from Docker Machine i.e. tcp://[ipaddress]:2376} |
| CA Certificate |
{Open ca.pem from the DOCKER_CERT_PATH folder and copy and paste the value here.} |
| Certificate |
{Open cert.pem from the DOCKER_CERT_PATH folder and copy and paste the value here.} |
| Key |
{Open key.pem from the DOCKER_CERT_PATH folder and copy and paste the value here.} |
- Click OK
- Click New Service Endpoint
- Select Docker Registry
| Field |
Value |
| Connection Name |
Docker Hub |
| Docker Registry |
https://index.docker.io/v1/ |
| Docker ID |
{Your Docker ID from Docker Hub. If you do not have one you can create a free account at hub.docker.com} |
| Password |
{Docker Hub password} |
| Email |
{Email used with Docker Hub} |
- Click OK
- Return to your build definition
- Click the Refresh icon next to Docker Host Connection
- Click the Refresh icon next to Docker Registry Connection
| Field |
Value |
| Docker Host Connection |
{Select Docker Host connection} |
| Docker Registry Connection |
{Select Docker Hub connection} |
| Action |
Build an image |
| Docker File |
$(Build.StagingDirectory)/drop/dockerfile |
| Image Name |
{must match "[a-z0-9]+(?:[._-][a-z0-9]+)*" } |
| Context |
$(Build.StagingDirectory)/drop |
- Select the second Docker task
- Click the Refresh icon next to Docker Host Connection
- Click the Refresh icon next to Docker Registry Connection
| Field |
Value |
| Docker Host Connection |
{Select Docker Host connection} |
| Docker Registry Connection |
{Select Docker Hub connection} |
| Action |
Run an image |
| Image Name |
{must match "[a-z0-9]+(?:[._-][a-z0-9]+)*" } |
| Container Name |
|
| Ports |
80:80 |
| Environment Variables |
ASPNETCORE_URLS=http://*:80 |
- Click Save
- Rename build
- Click OK
- Click Queue build…
- Click OK
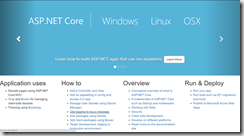
Once the build completes, you should be able to use a browser and enter your Docker Host’s IP address in the address bar. You can get your Docker Host’s IP address from the Docker Machine output.

If your images fail to run, use the logs command to see what errors were thrown. If you see “Did not find a suitable dotnet SDK at '/usr/share/dotnet', install dotnet SDK from https://github.com/dotnet/cli” and check the spelling and casing of your DLL in your dockerfile.
Now you can deploy your ASP.NET Core RC2 application to Azure Web Apps or Docker containers.