Problem:
I created a shiny
new V2 IaaS Azure VM using the Preview Portal and I can’t figure out the FQDN.
Solution:
Use New-AzurePublicIpAddress
cmdlet to assign a public IP with a domain name label and associate it with the
NIC on the VM.
Explanation:
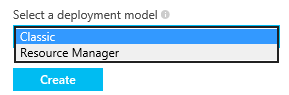
I wanted to
stand up a Linux VM in Azure as a Docker host today. I saw the option to select a deployment model
and thought “what is this?”.
Oh, cool,
they now support Resource Manager. Why
not? What could go wrong?
The Resource
Group and all the resources spun up very quickly. I knew this was a good idea! I fire up Putty and type
<myVMName>.cloudapp.net but it failed to connect. That is strange; let me go see what the cloud
service name is. Hmm, that is weird - I
can’t find the cloud service. I will just return to the current portal and find
it there. Okay, now I don’t see any of
the resources I just created. I press F5
a few times, but no luck. Now I am thinking “did anything actually get created?”.
I return to the Preview Portal and there is my Resource Group and my VM
inside. Okay, there is a public IP; let
me see if this machine is really running.
I use the IP in Putty and I am able to connect. Okay, so it is working. But no one in their
right mind would use the IP address over a FQDN. That would be up on the top 10 list of stupid
things to do. So the FQDN has to be in
here somewhere. There is no way the portal is missing that. Come on, it has to be here somewhere. I spend an hour looking around the portal and
clicking everything I can find to figure out the FQDN of my shiny new V2 IaaS
VM. It is nowhere to be found. Off to Bing and Google I go.
The first link
I find tells me that all you know and learned about IaaS VMs in Azure has
changed. Cloud Services and Endpoints
are all gone and DNS Names have changed from mycoffeeshop.cloudapp.net to <domainlabel>.<region>.cloudapp.azure.com. Okay, great, but how do I set the
domainlabel? Back to the portal I go
looking for a domainlabel. You guessed
it: nowhere to be found.
The first walk
through I find shares a note that the DNS name is not created, but kindly
ignores the topic of how to create a FQDN and suggests using the IP as if that
is what I really want to do.
I fire up
Skype and start pinging my friends asking if anyone knows how to do this. I was starting to think I would just delete
the resource group and start over with V1 VM because I am now about three hours
in and have nothing to show for it. Not only this, I am no closer to hosting my
Docker containers in my new shiny V2 IaaS VM on premium drives. But finally Keith Mayer was able to point me in
the right direction. Had I not used the
portal I would not have been in the position I was in. As Keith shows here,
using ARM and PowerShell you can get the job done all at once.
But I
already have a machine and I just need a FQDN on my public IP (PIP). The only way to do this as of this writing is
by dropping down to the command line and using New-AzurePublicIpAddress. Had I known this beforehand, I would have
avoided the Preview Portal all together.
Step one is
to make sure you have the latest Azure PowerShell on your machine. You can
download and install the Azure PowerShell modules by running the Microsoft
Web Platform Installer.
Once the
components are installed, we need to configure the Azure PowerShell tools to
connect them to your Azure Subscription.
To begin, run the Add-AzureAccount cmdlet. If you have more than one subscription
connected to the account, you will need to set the default subscription. You can see how to do that here.
If you were
to try and use New-AzurePublicIpAddress now, you would get an error. The reason is because that cmdlet is in
another module that is not loaded by default.
To load the correct cmdlets, you need to use the Switch-AzureMode cmdlet.
Switch-AzureMode
-Name AzureResourceManager
Now you
should be able to type:
help
New-AzurePublicIpAddress
Now you need
to execute the New-AzurePublicIpAddress cmdlet passing in the following
arguments:
New-AzurePublicIpAddress
-Name <Name> -ResourceGroupName <Resource Group> -Location <Region>
-DomainNameLabel "<SubDomain>" -AllocationMethod Dynamic
This will
add a public IP to your resource group.
Now you have to bind the IP to the NIC on the VM. Using the Preview Portal, locate the resource
group that contains your VM. It will also contain your network interface. Select the network interface to open that
blade. Now click the Public IP Address that
will be a link. Click the Dissociate
button in the toolbar. Don’t click the Delete button first even though it is
enabled, which would lead you to believe you could, because if you do, you will
get an error! Once you dissociate the IP, you can now delete it. Hmm, maybe they should disable the Delete
button if the IP is associated with a NIC. Nah! That would make too much sense.
The Network Interface blade does not seem to update, but click the Settings
link in that blade again anyway. Now
click the IP addresses. Change Public IP
address from Disabled to Enabled. Now
click the Configure required settings link.
On the next blade, you should see the IP you configured from PowerShell.
Select the IP and, once the blade closes, click the Save button on the IP
addresses blade.
Now if you
return to your Virtual Machine blade and click the Public IP address link, you
will open the Public IP address blade.
You will now see a new label named DNS name! Believe it or not, you can now use that FQDN
to access your VM.
Now, wasn’t
that easy, boys and girls?